


Table of Contents
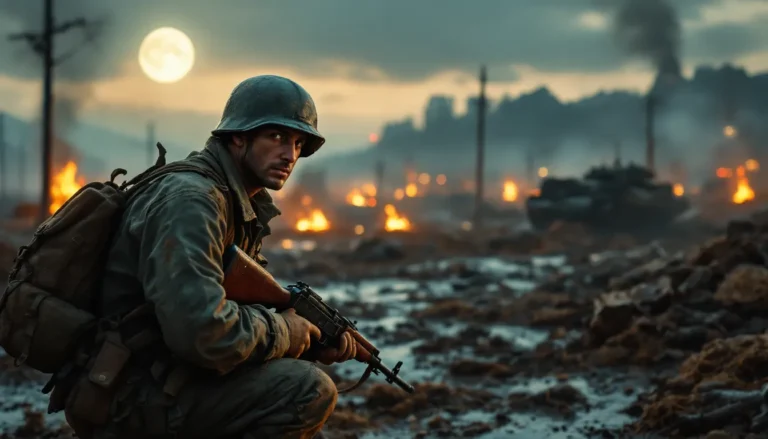
ToggleThe Light Assault is Battlefield 3’s ultimate momentum class. If you’ve ever watched a skilled player zip through the map, delivering precision firepower from unexpected angles, then vanishing before enemies can react, that’s a Light Assault at work. This class thrives on speed, verticality, and aggressive positioning, making it the go-to pick for players who want to control the tempo of engagements. Unlike the Engineer’s defensive playstyle or the Support’s dependence on positioning, the Light Assault forces the action on their terms. Mastering this class means understanding not just which weapons to carry, but how to move through space, predict enemy rotations, and leverage your jetpack to create unfair fights. Whether you’re grinding for that next unlock or prepping for competitive matches, this guide will break down everything you need to dominate as Light Assault.
Key Takeaways
- Light Assault in Battlefield 3 dominates through speed, verticality, and aggressive positioning enabled by the jetpack as its signature tool.
- Master fuel management and micro-burst techniques to maintain constant mobility without depleting your jetpack between strategic repositioning.
- The F2000 with Foregrip and RDS Holographic is the meta primary weapon for Light Assault, offering minimal vertical recoil and the fastest time-to-kill at close range.
- Pair Light Assault with squad synergy—particularly an Engineer for vehicle defense—and use coordinated callouts to control objectives rather than chasing solo kills.
- Avoid predictable rooftop routes and overcommitting to engagements; always maintain exit routes and retreat after winning fights to avoid third-party elimination.
- Adapt your loadout and playstyle to each map and game mode: use C4 on vehicle-heavy maps, med kits for solo aggressive play, and defibrillators for coordinated squads.
Understanding The Light Assault Playstyle
Role And Strengths In Squad Dynamics
The Light Assault excels at being the squad’s aggressive spearhead. Your job isn’t to hold a line, it’s to punch through enemy formations, clear objective areas, and create chaos that forces opponents to react. With the jetpack as your signature tool, you’re the first vertical threat enemies will face, making you invaluable when attacking objectives on multi-level maps like Damavand Peak or Operation Métro.
Your primary strength lies in mobility and survivability through movement. While Assault (the medic equivalent) has superior firepower at range, Light Assault trades some raw DPS for the ability to retreat, reposition, and flank without waiting for respawn timers. You’re the class that rewards excellent map awareness and mechanical skill. High-level Light Assault players dominate servers because they’re consistently in favorable positions, not through luck, but through understanding sight lines, stack spawns, and predictable enemy rotations.
Squad synergy is critical. A skilled Light Assault paired with an Engineer creates a nearly unbeatable combo on objectives. While the Engineer holds the position and repairs vehicles, you can jet around corners, clear rooftops, and suppress flankers. Your teammates can spawn off you, multiplying your impact far beyond your individual kills.
Key Weaknesses To Overcome
Light Assault isn’t invincible, and understanding your limitations separates mediocre players from great ones. First, your magazine capacity and sustained DPS lag behind pure Assault. If you find yourself in extended mid-range firefights without cover, you’ll lose 1v1s against players with better weapons and more rounds downrange.
Second, the jetpack’s fuel consumption is brutal when mismanaged. Spam it for three seconds, and you’re earthbound for eight seconds, a window where enemies can pin you down or hunt you. Many newer players waste fuel on unnecessary jumps, then can’t escape when third-partied.
Third, you’re inherently squishy. No class perk gives you extra health. If you’re caught out of position without an escape route, a single Support player with an LMG will shred you. This means your positioning strategy must be proactive, not reactive.
Finally, your gadget choices create specific vulnerabilities. If you pick a med pack for self-healing, you lose access to flashbangs or C4. This forces hard choices in loadout design based on map and game mode.
Essential Light Assault Loadout Configurations
Primary Weapon Selection And Attachments
Weapon choice shapes your entire playstyle. The Light Assault’s weapon pool favors assault rifles and carbines, each with distinct engagement ranges and recoil profiles.
The F2000 is the meta pick for experienced players on Patch 1.06+. It boasts the fastest TTK (time-to-kill) at close range with minimal vertical recoil. Pair it with Foregrip and RDS Holographic for tight hip-fire and reliable ADS control. On Maps like Operation Métro’s objectives, this combination becomes nearly unstoppable.
The AK-74M offers better mid-range accuracy than the F2000 but requires burst-fire discipline. Use Angled Foregrip instead of vertical to combat its side-to-side kick. PK-AS scope or Holographic both work depending on your engagement zones. This is the safer pick if you’re learning the class.
The M16A4 feels dated compared to newer carbines, but its three-round burst can delete targets at medium range. Only pick this if you’re comfortable with timing bursts, spray-and-pray gets you killed fast.
Avoid the G3A1 unless you’re specifically defending heavy vehicles. Its recoil is punishing for mobile gameplay, and Light Assault doesn’t have the stationary positioning to leverage its mid-range power.
Attachment rule: Foregrip is mandatory for hipfire accuracy when you’re rushing. Skip laser attachments, they mark your position, and visibility in Battlefield 3 means everything. Flashlights are only useful in Operation Métro on Conquest mode.
Secondary Weapons And Throwables
Your secondary weapon is your insurance policy. The MP7 is the undisputed best pistol for Light Assault, it has 40 rounds, laser accuracy, and TTK comparable to some primaries when you land headshots. With just the Red Dot, it becomes a viable backup weapon for close-quarters cleanup.
Frag grenades are your opener. Most engagements start with a grenade to force movement, flush cover, or damage clustered enemies. A skilled player never runs out of grenades because they’re using them to shape engagements, not just spam. On objective modes, your grenade is often the difference between a capture and a failed push.
C4 is your secondary gadget option for anti-vehicle work. If the enemy team has a heli or tank controlling the map, C4 lets you threaten vehicles as a solo player. Plant it around corners, then peek with primary weapon drawn. Two blocks take down most vehicles, one block + primary fire finish the job.
If you’re on a team with zero anti-air presence, sometimes switching to flashbangs is worth it. They enable aggressive pushes by blinding defenders momentarily, though they require perfect timing and squad coordination to maximize value.
Gadgets And Special Equipment
Gadget selection is where Light Assault playstyles diverge most sharply.
The Med Kit (self-healing option) is the pick for solo players and aggressive engagements. Heal between fights, never depend on a medic, and stay in rhythm. On maps like Grand Bazaar, where you’re constantly pushing new zones, self-sustainability wins.
The Defibrillator pairs best with coordinated squads. If your team has comms and you’re reviving teammates in the chaos of Conquest, you’re multiplying your squad’s impact. Pro teams often run dedicated defibrillator Light Assaults for this reason.
As your second gadget, C4 dominates on Vehicle-heavy maps (Caspian Border, Damavand Peak). If vehicles are controlled by the enemy, your C4 is a force multiplier that opens windows for your team to push objectives.
Recon grenade is situational. It’s mainly useful for communicating enemy positions to teammates in premade squads. For general pub play, it’s dead weight.
Avoid Motion sensor entirely, your jetpack mobility means you don’t benefit from static detection tools. Assault and Engineer need motion sensors: you need damage and vertical advantage.
Map Positioning And Movement Tactics
Vertical Mobility Strategies
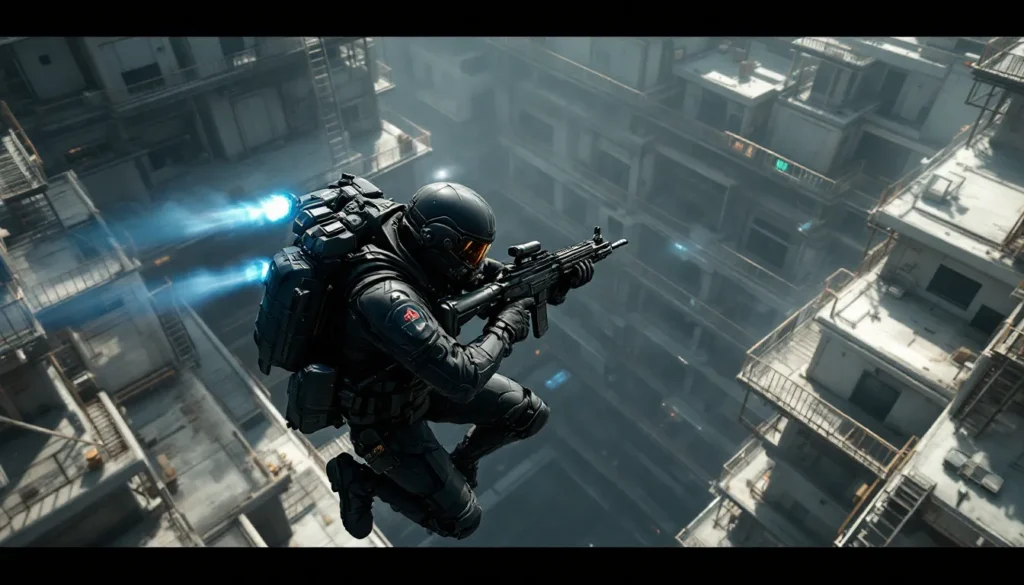
The jetpack is what separates Light Assault from every other class, and mastering its rhythm is the single most impactful skill you can develop. Vertical positioning means fighting enemies where they least expect threats, rooftops, catwalks, second-story windows. On Operation Métro, experienced Light Assault players are constantly on the ticket booth roof or hanging above the main hallways, creating angles that force Engineers and Assaults to either flee or die.
Fuel management is everything. You have roughly 10 seconds of total flight time per jetpack cycle, with an 8-second recharge. Don’t blow all fuel jumping to one rooftop. Instead, use micro-bursts: a one-second hop to gain height, a two-second burst to traverse a gap, then landing to let fuel regenerate. On maps like Damavand Peak, you can rotate between three different rooftop positions, the apartment building, the antennae platform, and the central rock, without fully depleting fuel between movements.
Timing matters too. Jet at predictable times (like when you spawn), and enemies will time grenades or pre-fire your landing spot. Wait until enemies are focused elsewhere, then use vertical to flank. On Caspian Border, while the main squad fights over flags, you’re using the terrain’s height variations and jetpack to slip behind their defense, threaten their logistics, and steal respawn spawns.
Another advanced tactic: use jet-assisted strafing. While air-strafing isn’t as pronounced as Source engine games, boosting horizontally while jumping gives you unpredictable movement that makes you harder to track. Combine this with tight aim, and opponents will struggle to land shots as you’re backpedaling with full-air control.
On vehicle-heavy maps, never fly in straight lines. Helicopters and vehicle gunners pre-fire common rooftop routes. Unpredictable paths with rapid direction changes are your lifeline. If a heli spots you, immediately break line of sight using buildings or terrain.
Flanking Routes And Engagement Zones
The best Light Assault players aren’t the ones with the highest kill-death ratio, they’re the ones forcing enemies into defensive retreats while their squad captures flags. You accomplish this by understanding sightlines and having practiced flanking routes memorized.
On Grand Bazaar Conquest, the meta flanking route is through the back alleyway toward the central market. While the main fight ignores that zone, you slip through, jump onto the market’s wooden stairs, and suddenly have a vantage point overlooking flag positions. Defenders hear footsteps behind them and mentally break, they either retreat or turn to face you, opening them to your squad’s primary engagement.
Engagement zones matter. You want fights where you’re setup first, ideally elevated or behind cover. Avoid open areas where LMG users or ARs with superior magazine capacity can suppress you. Room-clearing and rooftop duels favor Light Assault because close engagement range maximizes your jetpack’s offensive value.
Chokepoint prediction is crucial on Conquest: ammo boxes, flags, and vehicle spawns. Enemies must funnel through certain routes. If you pre-position on that route 15 seconds before they arrive, their squad loses cohesion and positioning advantage. One Light Assault holding a flanking route can delay an entire squad push, buying time for your team to reinforce.
Finally, always have an exit route planned. If your opening attack gets suppressed or third-partied, you need a predictable escape, a doorway you can jet through, a rooftop you can leap from, a hallway you can sprint down. Dying while trying to maintain position wastes your respawn timer and momentum.
Combat Techniques For Dominating Engagements
Close-Quarter Firefight Optimization
Light Assault shines in close-quarters combat, where your speed and positioning trump raw firepower. The moment you engage, you should be thinking one step ahead: where will the enemy retreat, and how do you cut that off?
When entering a room, ADS (aim-down-sights) isn’t always your best option if you expect enemy presence within 10 meters. Hipfire with foregrip attachment is genuinely competitive at close range, and the faster aimed-in time gives you a split-second advantage. Burst-fire to control recoil: don’t spray. The F2000 especially rewards tight trigger discipline over full-auto holding.
Strafe aggressively. Most players stand relatively still while aiming. You’re moving left, right, backwards, using your movement speed as evasion. This is where playing on higher sensitivity (around 15-20 depending on DPI) pays dividends. You want snappy response without sacrificing long-range control. Pro player settings typically hover around 700-800 DPI with in-game sensitivity between 10-20, giving you the speed to dodge while maintaining accuracy.
And here’s the crucial part: after landing a few shots, reposition. Don’t stay in the same spot thinking you’ll finish the kill. If the enemy has teammates converging, you’re about to get sandwiched. Back away, reload, let them chase you into a position where your squad can help. This is how you avoid dying to third parties, by never fully committing to extended firefights.
Jetpack Management And Timing
Your jetpack is your offensive tool, but it’s also your defensive escape. Understanding when to burn fuel and when to conserve it defines your skill level. On Operation Métro Conquest, pushing into the tunnel toward the enemy’s flag requires fuel management. Jump onto a ledge, pause briefly to regen fuel, then burst through the next doorway. This rhythmic use of flight keeps you airborne longer than new players who just hold the button.
During active firefights, don’t jet wildly. A controlled vertical boost, hitting space for half a second during strafe combat, gives you air control and unpredictability without wasting precious fuel. Then land and reposition using terrain, not flight.
The most advanced technique is using jetpack momentum to cut corners tighter. In tight hallways, a brief upward boost as you round a corner reduces the arc of your turn, making you faster and harder to track. Enemies expecting you to move horizontally suddenly see you flying diagonally up and sideways, the prediction breaks.
Timing applies to escaping vehicles too. If a tank rounds a corner, your jetpack resets your positional advantage. While the tank turns to follow, you’re already on a rooftop. This is why Light Assault can solo threaten vehicles that would devastate other classes.
One subtle skill: jetpack out of grenades. A frag lands near you, and instead of sprinting, a quick upward boost carries you over the blast radius. It costs fuel but saves your life. New players don’t expect this, so it’s a free advantage until you hit higher-skill lobbies.
Advanced Tips For Maximizing Your Impact
Team Synergy And Squad Coordination
The difference between a 1.2 K/D Light Assault and a 2.0+ K/D Light Assault is squad awareness. You could be the best gunfighter on the server, but if you’re not coordinating with your squad, you’re leaving wins on the table.
The ideal squad composition for competitive play is: Light Assault (you), Engineer, Support, and Assault. This gives you anti-vehicle, sustained fire, healing, and mobility. Your job in a coordinated squad is to punch in first, force enemy positioning to break, and create openings for your teammates to capitalize. If your Engineer is behind you with an AT Mine ready, you’re not solo, you’re a two-piece unit that scares off vehicles.
Use squad spawning strategically. Don’t spawn on your squad leader if they’re in a bad position. Spawn at objectives where your team needs numerical advantage. Once you’re forward, place yourself where it benefits your squad most: flanking routes that cover medic spawns, rooftops that suppress enemy advances, objective positions that your Assault can reinforce.
Communication changes everything. Even basic callouts (“sniper left building,” “tank rotating”) transform random squads into coordinated units. Competitive teams running Light Assault have voice comms, and timing pushes with callouts means you hit objectives exactly when your squad is ready to support. Pub lobbies rarely have this, but if you’re in a partial squad with one or two teammates on Discord, those communications are your edge.
Finally, understand when to push and when to play for objective time. If the match is tight, you don’t need a 10-kill streak, you need flag control. A Light Assault holding a rooftop that denies enemy movement is worth more than one pushing kills in a side street.
Adapting To Different Game Modes
Conquest is where Light Assault excels because vertical mobility threatens every objective angle. Spawn at a flag, jet to the rooftop overlooking it, and you’ve created an entire defensive zone. On maps like All Battlefield Games in Order, each iteration emphasizes different verticality options, so understanding map layouts across the franchise helps you predict where threats emerge.
Rush mode demands different priorities. You’re either defending MComs (static positions) or attacking them. As attacker, your jetpack gets you behind defending Engineers’ sightlines. Jet around their fortified position, plant the charge, and force them to either abandon cover or die pushing you. As defender, you’re patrolling zones and denying flanks. On Operation Métro Rush, holding the high ground near MCom objectives is crucial, a Light Assault perched on scaffolding controls the entire approach.
Squad Deathmatch and TDM strip away objectives, making pure gunfight stats everything. Here, your positioning and aim define matches. Land initial engagements against isolated enemies, avoid meatgrinders where numbers matter, and stack kills off objective control. Light Assault dominates TDM because your mobility lets you pick fights against enemies out of position.
Captain Mode (if playing custom servers) rewards map control above all else. Veteran Light Assault players will run entire zones, making them no-fly zones for enemies. High K/D means nothing, map dominance and objective time mean everything. Your jetpack becomes a control tool, not an offense tool.
Understanding these differences means you’re not grinding the same strategy on every mode. You adapt your positioning, gadget choices, and aggressiveness based on what the mode demands. This flexibility is what separates experienced players from grinders who only know one playstyle.
Common Mistakes And How To Avoid Them
New and intermediate Light Assault players fall into predictable traps that cost them kills, deaths, and positioning advantage. Understanding these mistakes accelerates your improvement curve significantly.
Wasting fuel on unnecessary jumps. Players jet around corners, jump over tiny ledges, boost across open areas where walking would work fine. You’re not flying in a flight sim, you’re in a competitive shooter where fuel is a limited resource. Reserve jetpack for vertical advantage, escaping grenades, or crossing dangerous sightlines. Walking through hallways doesn’t need jets.
Overcommitting to engagements. You land a good flank, get two kills, feel invincible, and push deeper into enemy territory. Their squad converges, and you’re surrounded with no escape route. Always maintain exit angles. When you’ve won your engagement, retreat and reset rather than pushing for the third kill. This is one of the hardest lessons, learning that surviving is better than dying with more kills.
Ignoring map callouts and enemy position. You’re busy farming kills while your squad is getting pinned at a flag two zones over. Light Assault is fast enough to rotate and break sieges, but only if you’re listening to teammates. A single Light Assault player breaking enemy focus can swing flag defense dramatically. The Loadout covers positioning guides for squads that emphasize team-wide rotations, similar principles apply here.
Poor gadget choices for the situation. Running med kits on Vehicle-heavy maps instead of C4 means you can’t threaten the heli dominating the server. Running defibrillators when your squad has no voice comms wastes gadget slot. Match your loadout to the map and enemy team composition. If they’ve got vehicle control, C4. If you’re solo, med kits. If your squad is coordinated, defibrillators.
Staying predictable with rooftop routes. You jet to the same building every respawn. Enemies learn this, pre-fire your landing, and you die instantly. Vary your approach. Take the long route, use horizontal terrain, mix in unexpected directions. Unpredictability is free difficulty increase for enemies.
Forgetting to reload between engagements. You land kills, get into another fight with a half-empty magazine, and lose the gunfight. Always reload behind cover after engagements end. This applies to every class, but Light Assault especially because your magazine capacity is lower than most primaries.
Not adapting to enemy playstyle. If they’re running LMGs and stationary positions, stop trying to engage them face-to-face at range. Use verticality, flank, and catch them from unexpected angles. If they’re aggressive Light Assaults like you, slow down gameplay and pick fights where you setup first. Flexibility in your playstyle matters more than rigid adherence to one strategy.
Conclusion
Mastering Light Assault in Battlefield 3 isn’t about memorizing gun stats or watching YouTube guides, it’s about building intuition around positioning, fuel management, and squad timing. The most dangerous players aren’t the ones with the highest aim: they’re the ones who know the map so well they can predict enemy rotations three steps ahead.
Start with the F2000, Foregrip, and Med Kit. Learn one map deeply: understand every rooftop, every flanking route, every choke point. Practice your jetpack rhythm until it’s muscle memory, micro-bursts for efficiency, controlled hops for verticality. Once you’ve internalized these mechanics, expand to other maps and adjust your loadouts based on vehicle presence and team composition.
Watch your own gameplay footage. Identify when you overcommit, when you waste fuel, when you could have escaped a third-party by rotating earlier. IGN’s guides and community resources offer additional perspectives, but your own replays are the best teacher.
The Light Assault reward curve is steep. Early on, the class feels weak compared to Assault’s damage output. But once positioning and timing click, you’ll be controlling engagements at a level other classes can’t reach. You’ll be the player that entire squads hunt because you’re the most dangerous threat on the server, not because of overpowered weapons, but because you’re always in a better position, always at full health, always ready for the next fight.
That’s the light assault advantage. Master it, and you’ll dominate.