


Table of Contents
ToggleChalmette Battlefield stands as one of the most historically rich and strategically complex maps in the Battlefield franchise. Named after the real-world Battle of New Orleans fought in 1815, this map translates genuine American history into dynamic, squad-focused warfare. Whether you’re dropping in on Conquest or pushing objectives in Breakthrough, Chalmette demands understanding of both terrain control and team coordination. This guide breaks down everything you need to dominate the map, from map layout fundamentals to class-specific tactics and vehicle strategies that separate casual players from those consistently securing victory.
Key Takeaways
- Chalmette Battlefield success depends on controlling two to three strategically separated flags rather than overextending across all five positions on the map.
- Master the terrain features—elevated western fortifications, exposed central field, and rolling eastern sections—to predict enemy positioning and deploy class loadouts effectively.
- Spawn denial tactics through Recon spawn beacon destruction and squad management force enemies into predictable routes, reducing their respawn efficiency by 10-15 seconds per cycle.
- Balanced squad composition with mixed Assault, Support, Recon, and Medic classes prevents coverage gaps and ensures team sustainability throughout all game phases.
- Avoid common mistakes like crossing the central open field solo, abandoning defensive positions prematurely, and misposing vehicles without infantry support to consistently secure victory.
- Vehicle and air support dominate only when uncontested—assign dedicated anti-tank specialists and lock-on missile users to counter-armor threats and maintain helicopter defense.
Understanding the Chalmette Battlefield Setting
Historical Context and Real-World Significance
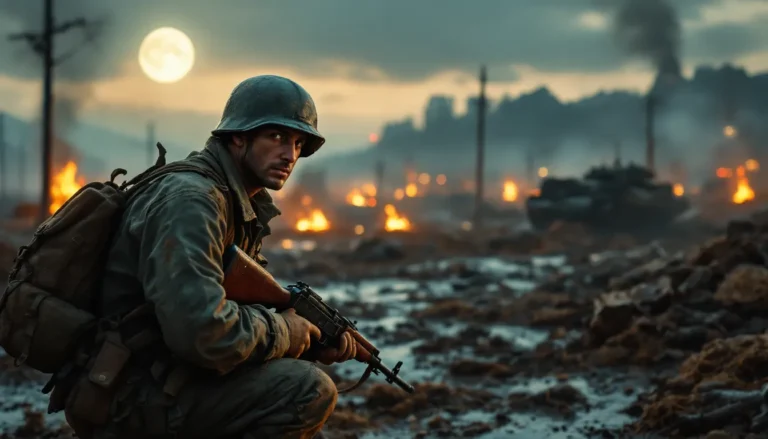
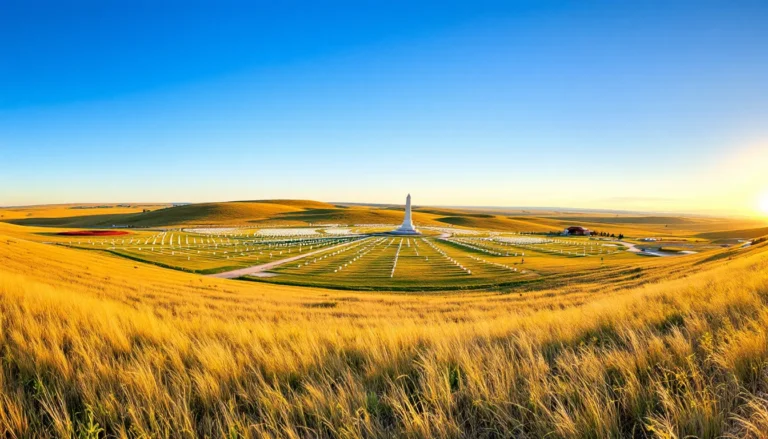
Chalmette Battlefield references the actual Battle of New Orleans, one of the most decisive American victories in the War of 1812. On January 8, 1815, American forces under General Andrew Jackson defeated a professional British army, becoming a defining moment in early American history. The real-world battlefield is now preserved as Chalmette Plantation National Monument in Louisiana, honoring the soldiers who fought there.
The game’s interpretation maintains this historical gravity while creating a playable multiplayer space. Rather than a direct copy of the actual terrain, developers crafted a map inspired by the marshland, defensive fortifications, and open spaces that characterized the historic engagement. This approach respects the location’s legacy while prioritizing gameplay balance and competitive viability.
How the Game Developers Adapted the Location
Developers transformed Chalmette from a historical setting into a multiplayer sandbox by emphasizing core design principles: sightlines, cover variety, and layered combat zones. The map retains thematic elements, fortifications, cannon placements, and period-appropriate aesthetics, without sacrificing modern gunplay mechanics.
Key adaptations include creating multiple elevation changes to reward positioning, designing flanking routes that prevent pure linear play, and balancing open areas with dense cover zones. This makes Chalmette suitable across multiple game modes, from free-for-all engagements to structured team-based objectives. The developers also ensured vehicle accessibility by maintaining clear routes while preventing vehicles from dominating every engagement angle.
The aesthetic choices, wooden fortifications, muddy terrain, distant treelines, create distinct visual landmarks that players use for callouts and navigation. This deliberate design ensures new players can learn the map quickly while veteran players exploit subtle positioning nuances.
Map Layout and Key Locations
Primary Control Points and Objectives
Chalmette features a multi-lane structure with distinct named locations serving as reference points:
- Breastwork (Flag A): The western fortification, typically a fight for early control. Offers elevated positioning and direct sightlines across the central field.
- Earthwork (Flag B/C depending on mode): Central objective located in the heart of the map. Ground-level engagement favors squad-based pushes and frequent rotations.
- Redoubt (Flag C/D): Eastern position with natural cover from terrain and wooden structures. Long-sightline battles characterize this zone.
- Supplies (Flag D/E): Northernmost objective near resource depot buildings. Close-quarters building fights mixed with open courtyard engagement.
- Swamp (additional location): Southern marsh area with water hazards and limited engagement visibility. Primarily a rotation route rather than primary combat zone.
Major game modes distribute flags across these five points, creating different strategic priorities per game type.
Terrain Features and Strategic Choke Points
Terrain dictates engagement distance and positioning options across Chalmette:
Elevation Tiers:
- The western fortifications sit elevated, providing height advantage for defending teams
- Central field drops to ground level, exposing players crossing open space
- Eastern sections feature rolling terrain with small hillocks offering natural cover
Critical Choke Points:
- The Courtyard Passage: Narrow route connecting north and central sectors. Predictable enemy movement makes it ideal for pre-positioned defenders and ambush tactics
- Central Open Field: Entirely exposed crossing with minimal cover. Vehicle control and suppressing fire make this a dangerous transit zone
- Northern Tree Line: Dense vegetation between Supplies and Earthwork offers cover but limits sightlines, favoring close-quarter engagements
- Eastern Ridge: Provides advantageous angles overlooking Earthwork. Controlling this height pays dividends in prolonged fights
Understanding these terrain features lets players predict enemy positioning and plan class loadouts accordingly. A Recon player benefits from ridge control: an Assault player thrives in tight courtyard spaces.
Winning Strategies for Chalmette Battlefield
Team Positioning and Spawn Management
Victory on Chalmette hinges on controlling spawn points and denying enemy reinforcements. Coordinated teams prioritize two primary objectives: securing map control through flag holds and establishing defensive spawns for team respawns.
Effective Spawn Strategy:
- Hold a minimum of two flags positioned far apart (e.g., A and C, or B and D). This forces enemies into predictable routes and complicates their spawn selection
- Assign dedicated defenders to each flag to maintain control during enemy pushes. Rotating defenders creates vulnerability: dedicated players prevent flag flips
- Use squad spawns strategically. Keeping a squad Medic alive in forward positions allows continuous team spawning near objectives without traveling across open field
Positional Priorities by Game Phase:
Early game (first 90 seconds): Secure closest flag to your starting spawn and establish defensive positioning at a second location. Avoid overextending: map knowledge and player prediction matter more than raw aggression.
Mid game (2-10 minutes): Control three flags if achievable, but consolidate around your two strongest positions. Teams attempting to hold all five flags typically spread too thin, allowing focused enemy pushes to flip individual flags.
Late game (final minutes): Defend high-ticket flags (those granting more points per second). If losing, concentrate forces on single flag for desperate pushback. Respawn timing becomes critical, every spawn matters.
Spawn Denial Tactics:
Contesting enemy spawn zones forces them into undesirable positions. Post a Recon class near enemy territory to detect and disrupt their spawn setup. Denying squad spawns forces infantry to respawn at distant main spawn, costing them 10-15 seconds per respawn.
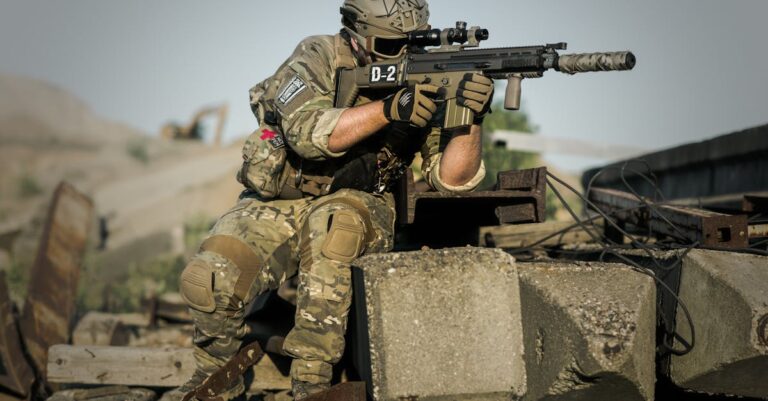
Class-Specific Tactics and Loadouts
Each class excels in specific Chalmette engagements. Balanced squads run mixed classes to cover all combat ranges.
Assault Class:
- Primary role: Close-quarters objective capture (Supplies, Earthwork courtyard)
- Key traits: Full health pool, grenade capabilities, shotgun/SMG dominance under 25m
- Loadout priority: SMG with extended magazine (25+ rounds), Medical Pouch for self-healing, Grenade for aggressive plays
- Chalmette application: Lead pushes through narrow passages: use grenades to flush defenders from fortifications
Support Class:
- Primary role: Team sustainability and suppression
- Key traits: Ammo supply, LMG magazine capacity, defensive reinforcement
- Loadout priority: LMG with bipod, Ammo Crate placed near flag positions, Claymore for choke point denial
- Chalmette application: Control central field from elevated positions: suppress enemy advances while teammates flank
Recon Class:
- Primary role: Intelligence gathering and positioning
- Key traits: Spawn beacon placement, motion sensor detection, sniper effectiveness
- Loadout priority: Bolt-action rifle with scope, Spawn Beacon for squad reinforcement, Motion Sensor for flank detection
- Chalmette application: Control eastern ridge overlooking central objectives: place beacon behind enemy lines for surprise flanks
Support/Specialist (Medic alternate):
- Primary role: Team revival and momentum maintenance
- Key traits: Continuous healing, revival capability, AR effectiveness
- Loadout priority: Assault Rifle balanced for all ranges, Medical Crate, Defibrillator for down teammate revival
- Chalmette application: Stay mid-squad tier: revive downed teammates maintaining numerical advantage: heal while holding objectives
Effective squads balance these roles. Never run double-Recon or double-Assault: coverage gaps appear immediately.
Vehicle Combat on the Map
Tank Routes and Armor Deployment
Vehicle spawns on Chalmette appear at main bases and occasionally near central objectives during specific game modes. Tank players should understand optimal routes and positioning that maximizes impact without overexposing expensive assets.
Primary Tank Routes:
Northern Route (West Spawn): Exit base heading northeast toward Supplies. This path avoids open-field exposure initially, using tree coverage until reaching northern approaches. Ideal for early flag capture support and denying enemy supply area.
Central Route (Symmetrical): Drive directly toward Earthwork/central flag. Provides flanking angles on defending infantry but exposes flanks to rocket specialists and counter-tank threats. Use this route only with infantry support or when enemy armor isn’t visible.
Eastern Route (East Spawn): Arc around eastern terrain toward Redoubt, then support western push. Longer route prevents early firefights but positions tanks for devastating flank support on dug-in defenders.
Tank Positioning Principles:
- Avoid isolated positions. Solo tanks die to focused infantry rocket barrages. Position near infantry squad locations (within ~50m) for mutual support
- Use terrain depression rather than open elevation. Tanks are vulnerable from high ground: position in valleys and behind ridgelines when possible
- Rotate positions every 15-20 seconds to prevent lock-on missile lock. Stationary targets get marked by Recon and deleted by Specialists
- Main gun engagement priority: Enemy armor first (1200+ damage per hit), then infantry clustered around flags
Anti-Tank Defense:
Infantry equipped with rocket launchers and C4 counter-armor effectively. Specialists carrying PIAT or M5 Recoilless deal 80-140 damage per hit: three shots typically guarantee tank destruction. Teams defending objectives often assign one player to anti-tank duty, preventing armor dominance.
Helicopter and Air Support Advantages
Helicopters provide devastating support on Chalmette if deployed intelligently. Attack and Transport helicopters excel in different scenarios.
Attack Helicopter Tactics:
- Optimal zones: Circle eastern and central areas where flag defenders cluster. Avoid western terrain (dense cover, tree protection)
- Loadout: Pair mini-gun primary armament with hydra rockets for vehicle/armor threats. Lock-on variants trade effectiveness for ease
- Engagement pattern: Make 2-3 gun runs per flag position, then reposition immediately. Predictability gets punished by lock-on missiles and homing rockets
- Duration: Maintain helicopter for 45-60 seconds maximum per position. Extended hovering risks lock-on acquisition from Recon spawn beacons
Transport Helicopter Advantages:
- Rapid squad deployment behind enemy lines. Pilot transport helicopters toward eastern flanks for unexpected teammate insertion
- Requires team coordination: pilot communicates landing zones to squad leader
- Best deployed during late-game defensive pushes when enemy attention concentrates on flag positions
Countering Air Threats:
Lock-on missile specialists are essential. Placing them near flag positions prevents helicopter dominance. Alternatively, Recon motion sensors detect helicopters circling, allowing teams to cluster defensively and minimize damage.
Helicopters dominate when uncontested. Single lock-on threat forces pilots into reactive patterns, reducing effectiveness significantly.
Common Mistakes and How to Avoid Them
Even experienced players fall into predictable Chalmette patterns that cost matches. Recognizing and correcting these mistakes accelerates skill development.
Mistake 1: Overextending to Capture All Five Flags
New players often attempt holding all five flags simultaneously, creating paper-thin defensive lines. Enemy teams punish this by committing force to single flags, overwhelming defenders.
Correction: Secure two flags separated by distance (e.g., A and C, or B and D). Concentrate remaining forces to prevent any single position from flipping. Three flags beats five held poorly.
Mistake 2: Ignoring Spawn Beacon Threats
Enemy Recon players planting spawn beacons behind your lines multiply enemy respawn rate by 50%. Teams ignoring beacon locations watch attackers appear behind defensive positions repeatedly.
Correction: Assign a player to sweep enemy territory every 60 seconds. Motion sensors or Recon spotting equipment identify beacon locations. Destroying beacons eliminates spawn advantage immediately.
Mistake 3: Crossing Central Field Solo
The exposed central field becomes an execution zone without suppressing fire or vehicle cover. Solo players traversing open space rarely survive.
Correction: Cross in squad formation with at least two players. Use Support LMG suppression to pin defenders while Assault players run flanking routes. Vehicles (jeeps, tanks) provide mobile cover.
Mistake 4: Abandoning Losing Flags
Teams defending flag C suddenly vanish without communication, allowing enemies free capture. Defending longer (even to the end) forces enemies into predictable rotations and respawn timing disadvantages.
Correction: Hold defending positions until squad lead explicitly calls retreat. Even delaying 20 additional seconds shifts enemy timing and team respawn windows favorably.
Mistake 5: Vehicle Misposition and Solo Plays
Tank drivers solo-pushing enemy territory ignore infantry cooperation and overexpose flanks to rocket specialist focuses. This consistently results in rapid vehicle loss.
Correction: Maintain infantry support within visual range. Communicate vehicle movement and objective to squad. Defensive positions (valleys, behind ridges) protect armor better than open approaches.
Mistake 6: Excessive Reload Timings During Objective Fights
Players reloading during active objective captures allow defenders free kills. Magazine discipline separates average players from strong performers.
Correction: Reload during repositioning between objective pushes, not during engagement windows. Practice weapon-swapping when current magazine depletes mid-fight.
Mistake 7: Ignoring Class-Specific Equipment Usage
Players spawn as Medic but never place medical crates. Support players carry ammo without supplying teammates. Equipment multiplies team effectiveness dramatically.
Correction: Place equipment within objective radius, not behind team lines. Medical Crates near Earthwork flag save 5-10 teammate respawns per match. Ammo crates eliminate redeployment necessity.
Conclusion
Chalmette Battlefield rewards understanding over pure gunplay skill. Map knowledge, spawn management, and coordinated class selection create victory conditions that consistent performers exploit repeatedly. The historical setting grounds the map in American military heritage while modern gameplay mechanics ensure fast-paced, squad-focused combat.
Dominating Chalmette requires internalizing terrain features, respecting vehicle mechanics, and avoiding predictable positioning patterns. Teams committing to controlled objective defense and spawn anchor tactics consistently outperform aggressive, uncoordinated opponents. Practice these strategies in pubs before competitive play: Chalmette’s complexity rewards studied execution.
As meta shifts and balance patches roll out, core principles remain constant: control terrain, deny spawn advantages, and maintain class balance. Apply these fundamentals, and Chalmette transforms from challenging map into personal hunting ground.