


Table of Contents
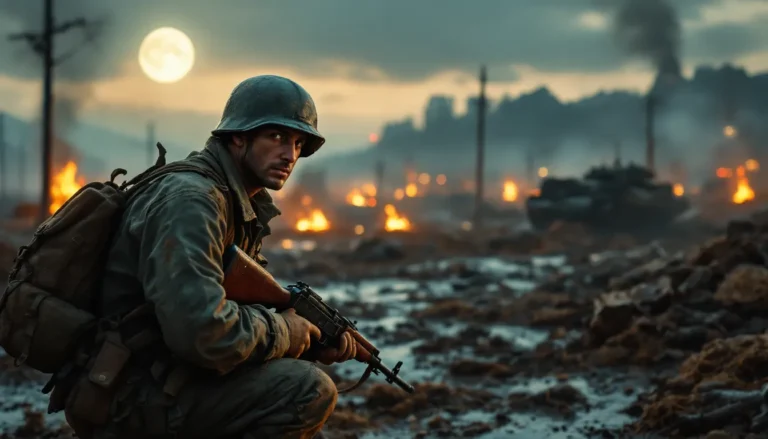
ToggleThe Kaiju Battlefield Surgeon has quietly become one of the most potent support roles in competitive gaming, blending aggressive healing output with survivability mechanics that keep teams in the fight when it matters most. Whether you’re climbing ranked ladders or grinding tournament qualifiers, mastering this class separates adequate support players from those who consistently clutch round-wins and enable their DPS carries to pop off. This guide digs into the exact mechanics, optimal loadouts, positioning strategies, and pro-level decision-making that will transform your gameplay from “keeping teammates alive” to “controlling the entire flow of battle.”
Key Takeaways
- The Kaiju Battlefield Surgeon blends aggressive healing with active combat participation, requiring high game sense and positioning discipline to prevent damage rather than just react to it.
- Master one of three core loadouts—Aggressive Burst, Support-First, or Hybrid Balance—based on your playstyle and team composition, as the 4.2.1 patch buffs favor cooldown-reduction stacking for sustained healing throughput.
- Pre-healing and predictive positioning separate competitive Surgeons from casual players; study enemy ultimate patterns and pre-position your Regeneration Field before burst damage lands.
- Avoid tunnel-vision healing, overextending for DPS, and wasting cooldowns; instead, maintain healing beam range discipline, use defensive abilities proactively, and communicate threat positions and ability status clinically.
- Climb ranked ladders by treating the Kaiju Battlefield Surgeon as a resource manager—optimize ability economy, lock in one equipment set, and focus on rotation discipline and team coordination over raw mechanical skill.
What Is The Kaiju Battlefield Surgeon Class?
The Kaiju Battlefield Surgeon is a hybrid support archetype designed for players who want high mechanical skill expression without sacrificing team utility. Unlike traditional pure-heal classes, the Surgeon excels at burst healing, damage mitigation, and mid-range combat presence, meaning you’re not relegated to backline babysitting while your team fights. You can actually participate in engagements, soften targets, and reposition aggressively.
This class sits at the intersection of medic and combat support. Your primary job is keeping teammates alive, but you accomplish this through active engagement: positioning yourself where threats emerge, pre-emptively healing teammates before damage spikes, and using crowd control abilities to prevent incoming damage in the first place. The skill ceiling is notably high because positioning mistakes are immediately punished, unlike pure tanks, Surgeons lack shields or defensive layers, so game sense becomes critical.
The 2026 patch cycle (Version 4.2.1 as of this guide’s publication) has introduced meaningful buffs to cooldown reduction on core healing abilities, making the class more forgiving for newer players while maintaining its skill-dependent ceiling. The meta has stabilized around aggressive early-round plays, where Surgeons with strong positioning knowledge can completely shut down enemy aggression before it starts.
The class performs identically across **PC, PS5, Xbox Series X
|
S, and select mobile platforms**, though aiming precision and reaction times remain faster on mouse-and-keyboard setups. Console players can absolutely compete at pro levels, but they’ll need tighter sensitivity tuning and predictive positioning.
Core Abilities And Healing Mechanics
Primary Healing Tools
Your healing toolkit has three core pillars: the Primary Heal Beam (your reliable, continuous healing source), the Burst Heal Grenade (area-of-effect emergency healing), and the Tactical Regeneration Field (ongoing passive healing in a zone).
The Primary Heal Beam fires on a 0.8-second cooldown and heals for 45 HP per tick on Version 4.2.1. It’s channeled, meaning you need line-of-sight and can’t attack while healing. This creates constant decision-making: do you stop healing to DPS a low-threat enemy, or maintain beam on a teammate who might need it in two seconds? Most pros develop an almost intuitive sense for this cadence, they beam until a teammate crosses a health threshold, then transition to DPS for 1-2 seconds before returning. Range is generous at 25 meters, so you can heal from safety without feeling completely disconnected from fights.
The Burst Heal Grenade (12-second cooldown) detonates on impact and heals all teammates in a 6-meter radius for 120 HP. This ability is your emergency tool and your playmaking button. In competitive, Surgeons constantly throw these into grouped-up teammates when enemy burst damage incoming (recognize the audio cues of enemy ultimates charging). The grenade also provides brief visual feedback, teammates get a green pulse when healed, which reinforces team coordination. If you’re playing at 2000+ SR, you’re probably using this on cooldown during team fights and banking it for defensive moments during lulls.
The Tactical Regeneration Field (18-second cooldown, lasts 8 seconds) creates a 10-meter healing zone that restores 25 HP/second to all nearby teammates. This ability is particularly strong on objective points or choke holds. Place it before entering a fight, and it provides passive sustain while you’re free to DPS. The zone persists even if you walk away, so you can set it defensively and then reposition, a mechanic that separates average Surgeons from great ones.
Defensive And Support Skills
Beyond pure healing, the Surgeon gets two defensive utilities: Kinetic Dampener (personal shield ability) and Tactical Disorientation (crowd control).
Kinetic Dampener (15-second cooldown) grants you a 100-point shield for 4 seconds. It’s not a heal, it’s absorption, so it stacks on top of your health bar and decays if not depleted. The strategic use here is recognizing when you’re about to take burst damage. A skilled Surgeon maintains spacing such that they can pop this defensively the moment they see an enemy burst combo incoming. It’s not a “I panicked” button: it’s a calculated tool. On Version 4.2.1, the cooldown reduction from passive cooldown stats is especially relevant, with full cooldown-stacking builds, you can achieve a 10-second effective cooldown, meaning near-permanent uptime during extended team fights.
Tactical Disorientation (20-second cooldown) slows and confuses enemies in a 5-meter radius for 2.5 seconds, causing their vision to blur and movement speed to drop by 30%. This isn’t raw damage prevention, but it’s arguably more valuable: confused enemies can’t land precision shots. Use this when an aggressive enemy diver (like a flank-heavy assassin) enters your team’s space. The confusion effect is particularly brutal in competitive because high-level players rely on crosshair placement and tracking, even 2.5 seconds of impaired vision throws off their entire economy of movement.
These utilities transform you from a pure healer into a true battlefield controller. You’re not just reacting to damage: you’re preventing it.
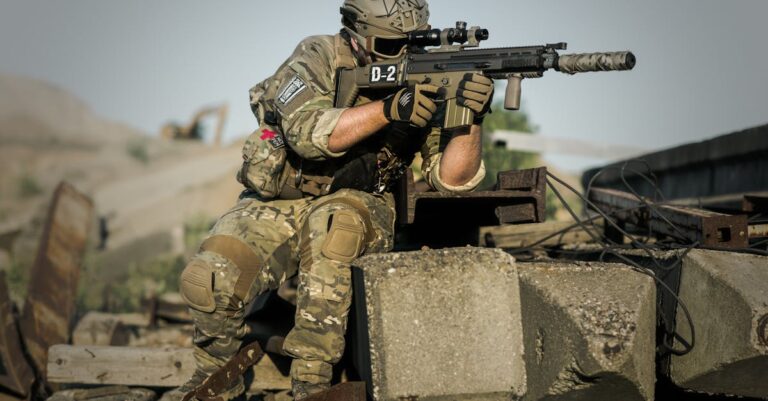
Optimal Loadouts For Competitive Play
Recommended Weapon And Equipment Combinations
Weapon selection drastically changes your playstyle and team synergy. The current meta (post-4.2.1 patch) favors one of three primary setups:
The Aggressive Burst Build pairs the Plasma Carbine with Velocity Enhancers and the Kinetic Dampener (personal shield). The Plasma Carbine has a 30-shot magazine and fires three-round bursts with 18 damage per round. Its TTK (time-to-kill) on unarmored targets is around 0.8 seconds. This loadout is for Surgeons comfortable with mechanical aiming. You’re not out-DPSing your team’s carry, but you can pressure isolated enemies and soften grouped targets before your real damage dealers arrive. Pair this with Ammo Efficiency boots (increases magazine capacity by 8 rounds) and you’re sustaining pressure without constantly dropping healing to reload. The trade-off: you heal less often because you’re busy shooting, so this works best with teams that have self-sustain or already possess good positioning awareness.
The Support-First Build runs the Helix Cannon (a close-range, high-spread weapon), Amplification Matrix (passive healing increase), and Tactical Regeneration Field as your primary utility. This is the “pure support” approach. Your gun is supplementary, the Helix Cannon deals 25 damage per pellet in a wide spread, making it difficult to land consistent shots, but it excels in close-quarters chaos where grouping happens anyway. You’re leaning entirely into healing output: healing beam ticks increase by 12% with the Amplification Matrix, healing grenades restore 15% additional health to teammates at critical (below 30%) health, and your Regeneration Field becomes your primary damage-prevention tool. This build shines in coordinated team environments (scrims, tournaments) where you have voice comms and teammates are actively playing around your healing presence.
The Hybrid Balance Build (most popular in solo-queue ranked) uses the Thermal Submachine Gun (25-round mag, 22 damage per shot, 1.2-second TTK) with standard armor pieces and no special weapon modifiers. This gives you solid DPS without sacrificing healing output. You maintain a 60-40 split between shooting and healing, which translates to “I’m helping my team both prevent and output damage.” The thermal SMG has lower range than the Plasma Carbine (effective at 15 meters versus 22), so positioning becomes even more critical, you need to be close enough to both heal and fight, but not so close you’re in the thick of melee range. Most 2500+ SR Surgeons default to this loadout when solo-queueing because it handles unpredictable team compositions.
Specialized Builds For Different Game Modes
Objective Control Mode (Payload/Point Capture) demands maximum team presence. Run the Support-First Build with Point Efficiency passive (healing scales +15% when healing teammates within 5 meters of objectives). Camp the objective, spam healing grenades on grouped teammates, and use your Regeneration Field directly on the payload or point. Your DPS is irrelevant, keeping four teammates alive for a full 30 seconds of objective push guarantees a round win. The Amplification Matrix passive becomes essential because multi-target healing matters more than burst single-target.
Elimination Mode (first team to three kills wins) flips priorities. Here, the Aggressive Burst Build excels because deaths are permanent, healing a teammate who’s about to die anyway is wasted healing. Instead, you’re pressuring enemies, enabling your DPS carries to get picks (isolated kills), and keeping healthy teammates alive. Healing becomes surgical and minimal. If your carry takes 40 damage, you heal them back to 100. If they’re full health, you’re shooting. This mode rewards map knowledge and positioning more than raw healing throughput.
Arena Skirmish Mode (smaller teams, tighter spaces) leans toward the Hybrid Balance Build because you’re constantly transitioning between healing and fighting. Space is limited, so the Thermal SMG’s shorter range is an asset. You’re rarely more than 10 meters from teammates, and cover is abundant, you can peek around corners, land a burst on an enemy, then retreat to heal. Regeneration Field becomes a zone-control tool in narrow hallways.
Advanced Positioning And Team Coordination Strategies
Map Control And Survival Tactics
Positioning is where casual Surgeons become competitive Surgeons. The fundamental rule: you need to be where damage happens before it happens. This means studying timers, understanding enemy rotations, and pre-positioning in spaces where engagements will likely occur.
On any map, identify three safe healing positions: one primary position (usually mid-range, offering sightlines to most teammates), one secondary position (different angle, further back), and one flank position (aggressive spot enabling burst DPS). Before each round, communicate which positions you’re occupying. Your team needs to know where you are, if your carry is 18 meters away and pinned down, but you’re 30 meters away around a corner, your presence becomes useless.
Higher-ranking players (2500+ SR) understand “passive sightlines.” These are angles where enemies struggle to kill you before you’re aware of them. For example, a position with cover that breaks sightlines from two common flank routes but maintains clear view of an objective. You’re literally invisible to 60% of enemy approaches while still seeing priority targets. Lower-ranked players often play in open areas with “safe” feeling because nothing’s immediately threatening them, this is a trap. You’ll get flanked, and you’ll die.
Rotation timing is critical. If an objective fight is concluding, you need to decide: stay here and defend the point in case enemies return, or rotate to the next map section where the next skirmish will occur? Most deaths happen during rotations because Surgeons get caught in transition zones. The habit: look at your minimap, note teammate positions, and move only when cover exists 100% of the path. If you must cross open ground, do it while teammates are alive and can provide suppressive fire.
Survival priority hierarchy:
- Don’t die for a teammate who’s already dead (if they’re low health and taking fire, let them take cover: don’t suicide-heal).
- Don’t stay in areas where you can’t rotate safely (always maintain escape routes).
- Don’t face-check corners without info (use your minimap obsessively: if you don’t know where an enemy is, assume they’re in the direction you’re heading).
When you’re low health yourself, healing teammates becomes secondary. A dead Surgeon heals nobody. The moment you’re below 50 HP, your priority flips: heal yourself to 100, position defensively, and only resume full-support mode once you’re safe.
Communication Tips For Squad Leadership
Surgeons often naturally fall into shot-calling roles because you have the clearest view of team-wide resource management. Your call-outs should focus on three categories: damage threats, positioning corrections, and ability readiness.
Damage Threats (“Flanker left side, 15 meters out”) let your team position defensively. Don’t just say “enemy nearby.” Be specific: direction, distance, how many. Your teammates are tunnel-visioned into their own fights: your job is lateral awareness.
Positioning Corrections (“Carry, move into healing range”) aren’t insults, they’re resource optimization. If your DPS carry is 28 meters away (outside your healing beam range) but you see incoming burst damage from an enemy ability, saying “come in closer” enables you to actually save them. Good teams immediately adjust. Bad teams see this as criticism and tunnel harder, but that’s not your problem. You’re doing your job.
Ability Readiness (“Regeneration Field on cooldown for 8 more seconds: avoid engages”) sets team expectations. If your healing field is down and enemy bursts are imminent, your team shouldn’t be fighting. They should be regrouping. Communicating cooldowns prevents the classic mistake: teammates fighting while you’re reloading, then dying and blaming you for “no healing.”
One pro tip from top-500 Surgeons: be boring in comms. Avoid banter, speculation, or emotional responses during gameplay. Call-outs, ability rotations, and strategy, that’s it. Excitement happens after rounds end. During gameplay, clinical communication wins games.
Common Mistakes And How To Avoid Them
Tunnel-vision healing: The most frequent mistake is healing one teammate obsessively while ignoring the bigger picture. You’re watching one person’s health bar so intently that you don’t notice an enemy flanker approaching. Solution: heal in short bursts (2-3 seconds), then scan your minimap and peek around to see enemy positions. Healing should be automatic-reflex stuff, not requiring your complete focus.
Wasting burst grenades: Throwing your Burst Heal Grenade when teammates are at 80% health wastes healing potential. Grenades should heal for their full 120 HP value. If a teammate is already healthy, don’t heal them. Wait until you see multiple teammates dropping below 60% simultaneously. Solution: discipline yourself to hold the grenade unless you’re actively seeing health bars drop. In team fights, you’ll get the optimal throw anyway.
Neglecting defensive abilities: New Surgeons forget to use Kinetic Dampener or Tactical Disorientation until they’re already getting burst. These abilities need to be proactive, not reactive. You should activate Kinetic Dampener the moment you see an enemy ultimate ability charge (audio and visual cues), not after you’ve already taken 80 damage. Solution: bind these to easy-access keys and develop the habit of “see threat audio cue → immediately pop defense.” The one-second faster reaction saves your life repeatedly.
Overextending for DPS: The temptation to “help” your team by dealing damage causes Surgeons to walk out of healing range. You push up with your Plasma Carbine, land a few shots, and suddenly you’re 22 meters away from your carry who just got dived. Now you can’t heal them, they die, and you feel helpless. Solution: establish your combat range. If your loadout has 18-meter effective range (Plasma Carbine), position yourself at 16 meters from your team, close enough to DPS, far enough to heal. Never drift beyond your healing beam range.
Not managing cooldowns: Experienced Surgeons are constantly aware: “Disorientation is down for 12 more seconds. Regeneration Field has 3 seconds left.” Bad Surgeons throw abilities on cool-down without strategy. If you drop your Tactical Disorientation field and immediately miss a critical moment where you need to confuse an enemy flanker, you’ve wasted the tool. Solution: use abilities with intent. Don’t spam them. Save Disorientation for actual flanker defense, not for “maybe they’ll come this way.”
Ignoring passive cooldown stat stacking: The 4.2.1 patch introduced new passive items that reduce ability cooldowns by 2-3% per item equipped. Most new Surgeons don’t stack these because they feel too small, but four items providing cooldown reduction equals 10-12% faster ability cycling. That transforms your healing capability mid-fight. You’re not experimenting with fun items, you’re optimizing for competitiveness. Solution: lock in one equipment set that maximizes cooldown reduction and stop swapping it around based on “vibes.”
Pro Tips From Top Competitive Players
Pre-healing: The best Surgeons don’t react to damage, they predict it. If you see enemies grouping up and you recognize their ultimate combos typically follow a pattern, you start healing your team before the burst even lands. Your Regeneration Field is already down, your Burst Heal Grenades are banked, and you’re waiting. When the enemy ultimate hits, your teammates barely dip below 80% health. This separates 2000 SR from 2800 SR Surgeons. How do you develop this? Watch pro streams, watch replay footage of your own games, and ask yourself: “When did enemies actually commit to damage?” Then practice pre-positioning your heals for exactly that timing.
Abusing sightlines: Top-500 Surgeons know maps so well they identify sightline creases where they’re visible to exactly two enemy positions but those two positions can’t simultaneously see them. They position themselves in these micro-angles. Enemies have to dedicate effort to re-position and attack, giving your team time to collapse. This sounds advanced, but it’s just map knowledge grinding. Spend one evening walking every map in practice mode, identifying these angles, and noting them.
Economy-awareness: In economy-based modes (where teams collectively “buy” equipment at the start of rounds), pro Surgeons always maintain full-buy rounds alongside their team. If your team goes full-buy, you go full-buy. If they’re on an eco round (saving money for next round), you’re eco too. This is basic, but it’s constantly overlooked by ranked players who think support can skimp on items. You cannot. You need full items, full stats, full defensive capability.
Ability economy in team fights: Once a team fight starts, don’t waste movement. Every inch you walk without purpose is an inch you could have moved to prevent an enemy flank. Pro Surgeons rotate between healing position A, healing position B, and defensive position C in the exact same pattern every fight. It looks boring on stream, but it’s optimization. You’re not thinking about rotation anymore: you’re thinking only about healing and threats.
Communication consistency: Top teams have call-out language nailed down. Everyone knows “Disorientation is down” means the same thing, said the same way, every single game. This eliminates confusion during high-intensity moments. New Surgeons vary their language (“confusion off,” “disorientation’s on cooldown,” “I can’t confuse”), causing teammates to miss information. Standardize your vocabulary.
One final insight from Kotaku’s coverage of esports professionalization: competitive gaming at high levels is increasingly about systems thinking and resource optimization, not raw mechanical skill. As a Surgeon, you’re the resource manager, ability cooldowns, positioning, and team economy are your domain. Master those systems, and mechanics become almost secondary.
Conclusion
Mastering the Kaiju Battlefield Surgeon transforms how you understand team-based combat. You move beyond “keeping teammates alive” into controlling healing economy, predicting damage, and enabling your carries to perform at their peak. The class demands mechanical skill (aiming, timing), game sense (map awareness, rotation discipline), and communication excellence, that’s why it’s genuinely one of the highest-skill-cap roles in competitive gaming.
Your immediate action items: lock in one loadout and master it completely (don’t swap between setups randomly). Spend your next five ranked sessions focusing exclusively on positioning and rotation, mechanics can come later. Watch one VOD of a pro Surgeon playing your favorite map, noting their healing patterns and positioning choices. Join a practice group and dedicate one night to team-play scrimmages where communication is nonnegotiable.
The 2026 meta is favorable to aggressive, knowledgeable Surgeons who understand their team’s win conditions and position accordingly. You now have the tactical framework. Execute it, grind, and climb.